

WordPress is probably the most common tool in the world to create websites and blogs, so here are some instructions on embedding the player into your blog or page. There are actually multiple ways to add Custom HTML to your blog. I’ll go through a couple of them.
First thing you need to do is to get the HTML code that you will be copying into your WordPress blog or page. You can do that on the Empora Skin Configuration page for the video you plan on embedding.
Here’s an instructional video:
Or if you don’t want to watch the video… here are the instructions:
So first thing you need to do is navigate to your control panel at https://empora.com and log in. Select the YouTube video you have already saved the skin for and look for the below image. If it doesn’t appear, that means you haven’t yet clicked on “Save Player Skin and Finish” to save your work.

On the Skin Configuration page on Empora.com, click on the Copy HTML button.
Method 1
Add a post as you normally would.

Look for this + button to the right side of your block. Click on it.
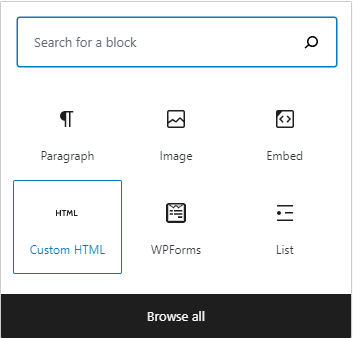
Select “Custom HTML” then Paste the code that you copied from your Empora Skin Configuration control panel.

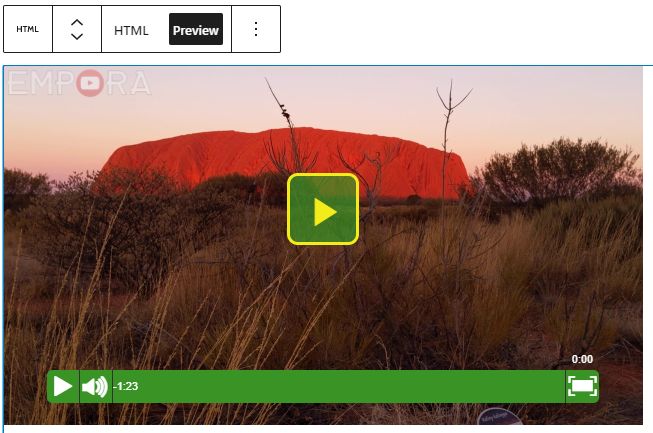
Click on Preview to make sure the video displays correctly.
Looks good. Now you can publish.
Method 2
As above, add a post as you normally would.

You’ll see this in the block. Press the “/” key to choose a block.

Scroll down and select “Custom HTML” then paste the code that you copied from your Empora Skin Configuration control panel.
Click on Preview to make sure the video displays correctly.
Looks good. Now you can publish.
Any questions? Leave a comment.
Comments